The Best Way to Upgrade to DCC: A Beginner's Step-by-Step Guide
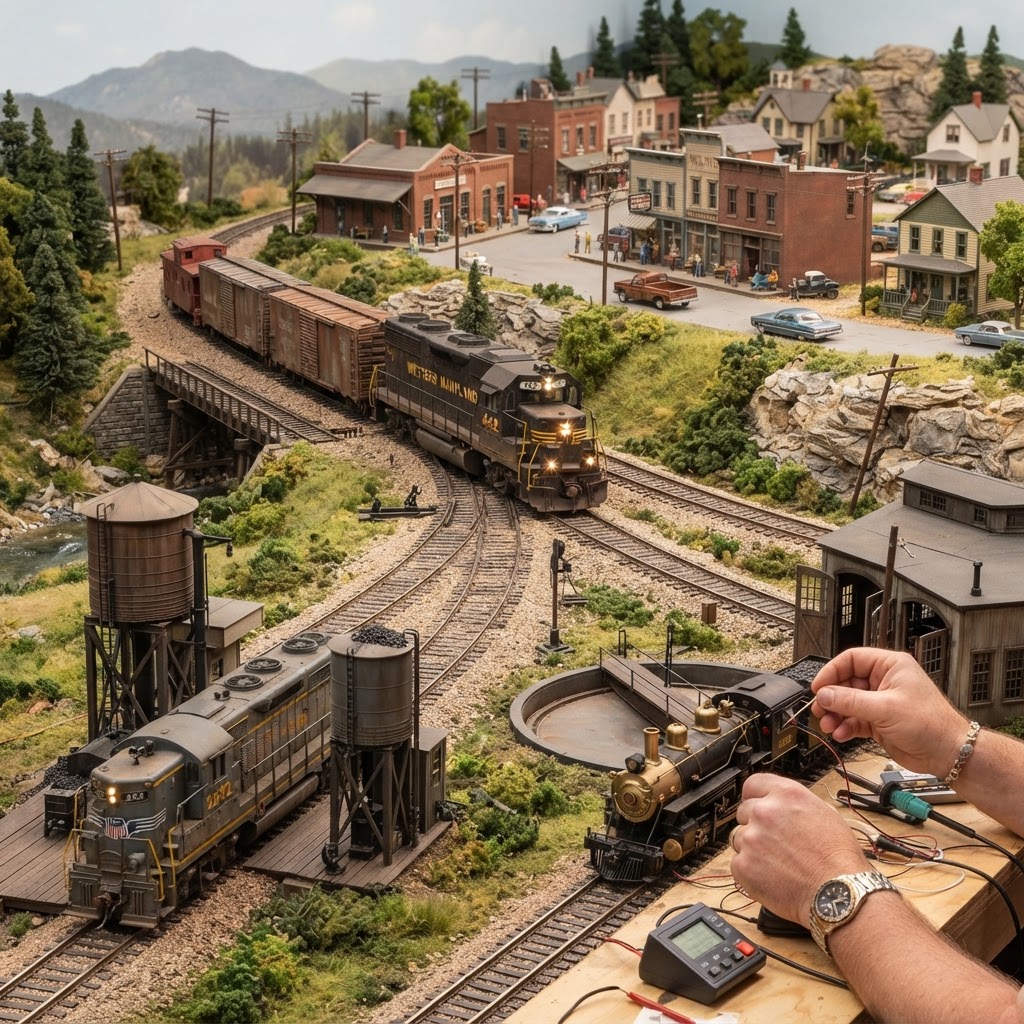
Making the switch from analog DC to Digital Command Control is one of the most exciting upgrades a model railroader can make — but it can also feel overwhelming if you don't know where to start. If you've been searching for the best way to upgrade to DCC, you're in the right place. Whether you're running a simple oval of track or a sprawling multi-level layout, converting to DCC opens up a world of independent locomotive control, realistic sound effects, and advanced automation that traditional DC systems simply can't match.
DCC technology has matured significantly over the past two decades, and today's systems are more accessible and affordable than ever before. Still, the process involves more than just swapping out a power pack. You'll need to think carefully about your existing locomotives, your layout wiring, and which DCC system best fits your operating style and budget. The good news is that with a little planning, the transition can be smooth, rewarding, and surprisingly straightforward.
In this guide, we'll walk you through every step of the upgrade process — from assessing your current setup to installing decoders, rewiring your layout, and choosing the right command station. We've packed this article with practical, expert-backed advice so you can make confident decisions at every stage of your DCC journey.
Why Upgrade to DCC? Understanding the Benefits
Before diving into the how, it's worth reinforcing the why. If you're still on the fence, consider reading our in-depth DCC vs DC: The Ultimate Guide to Choosing the Best Model Train Power System for a full breakdown of the differences. But here's a quick summary of what DCC brings to the table:
- Independent locomotive control: Run multiple trains on the same track simultaneously without complex block wiring
- Realistic sound: Many decoders support full audio — diesel prime movers, steam exhausts, whistles, bells, and more
- Fine speed control: DCC offers smoother, more prototypical slow-speed performance
- Lighting effects: Headlights, cab lights, and ditch lights can be independently controlled
- Automation and signaling: Advanced layouts can incorporate automatic block detection, signals, and even computer control
For collectors with a mix of steam engine models and diesel locomotives, DCC is particularly compelling — you can tailor each decoder's settings to match the unique characteristics of every locomotive in your fleet.
Step 1: Assess Your Current Layout and Locomotives
Take Stock of What You Have
The first step in any successful DCC upgrade is a thorough inventory. Walk your layout and note the following:
- How many locomotives do you own? Each one will need a decoder installed or replaced.
- Are your locomotives DCC-ready? Many modern locomotives come with a NMRA-standard DCC socket (8-pin, 21-pin, or Next18), making decoder installation a plug-and-play affair.
- Are any locomotives DCC-equipped already? Some newer models ship with decoders pre-installed.
- What scale are you running? The scale affects which decoders fit and which systems are most practical. If you're still deciding on scale, check out our Ultimate Beginner Guide to Model Train Scales and our comparison of HO Scale vs N Scale.
Evaluate Your Existing Wiring
DC layouts with extensive block wiring can actually be simplified when converting to DCC, since you no longer need separate power districts for directional control. However, you will want to:
- Ensure your track bus wires are heavy enough (14–16 AWG for the main bus is recommended)
- Check all rail joiners for good electrical continuity
- Identify any reverse loops or wye tracks that will need special treatment (reverse loop modules)
Step 2: Choose the Right DCC System
This is arguably the most important decision in your upgrade. Your command station and throttle will be the nerve center of your entire railroad, so it pays to choose wisely. We've put together a detailed review of the 5 Best DCC Systems for Home Model Railroads to help you compare options.
Key Factors to Consider
Layout Size and Complexity Smaller layouts with just a few locomotives can be well-served by entry-level systems like the Digitrax Zephyr or NCE PowerCab. Larger, more complex operations may benefit from expandable systems with booster support and computer interface capability.
Throttle Style Do you prefer a handheld walk-around throttle, a smartphone app, or a dedicated control panel? Many modern DCC systems offer Wi-Fi or Bluetooth integration, letting you control trains from your phone or tablet.
Budget Entry-level DCC starter systems can be found for under $150, while professional-grade command stations with full booster capability can run $300–$600 or more. Set a realistic budget before shopping.
Community and Support Brands like Digitrax, NCE, Lenz, and ESU have large user communities and extensive online documentation — invaluable when you're troubleshooting at 11pm on a Saturday.
Step 3: Install DCC Decoders in Your Locomotives
DCC-Ready vs. Hardwired Locomotives
If your locomotives have a factory-installed DCC socket, installation is simple: remove the dummy plug and insert a compatible decoder. This is the fastest and cleanest installation method.
For older or budget locomotives without a socket, you'll need to hardwire a decoder directly to the motor, lights, and any other functions. This requires basic soldering skills and a steady hand. Don't let that intimidate you — with practice, it becomes second nature.
Choosing the Right Decoder
Decoders come in a range of sizes, feature sets, and price points. Here's what to look for:
- Physical size: Make sure the decoder fits inside the locomotive's shell. N scale locomotives require especially compact decoders.
- Motor type: Most modern decoders support both coreless and standard DC motors, but double-check compatibility.
- Sound vs. silent: Sound decoders add significant realism but cost more. Consider prioritizing sound for your most-used or most-prized locomotives first.
- Functions: If you want to control multiple lighting circuits or smoke units, choose a decoder with enough function outputs.
For high-end locomotives — particularly brass models — consider premium sound decoders from brands like ESU LokSound or SoundTraxx Tsunami2. The investment is worth it for a centerpiece locomotive.
Tips for a Clean Installation
- Work in a well-lit area with magnification if needed
- Use quality tools — fine-tipped soldering irons, heat shrink tubing, and precision screwdrivers. See our guide to the best tools for model trains for specific recommendations, and browse our recommended products for trusted brands.
- Test each locomotive on a programming track before placing it on the layout
- Label each decoder's address in a logbook or spreadsheet for easy reference
Step 4: Rewire Your Layout for DCC
Simplifying Block Wiring
One of DCC's great gifts to layout builders is the elimination of complex block wiring for directional control. On a DCC layout, the entire track is powered all the time — the command station sends digital signals through the rails to communicate with each decoder individually.
This means you can often remove many of the toggle switches and DPDT blocks you installed for DC operation. However, you should still consider:
- Power districts: Divide larger layouts into separate power districts fed by boosters or circuit breakers. This limits the area affected if a short circuit occurs.
- Reverse loops: These still require special handling. Use an automatic reverse loop module (available from Digitrax, NCE, and others) to eliminate the headache of manual polarity switching.
- Turnout control: DCC accessory decoders can control turnouts and signals from your throttle, adding another layer of automation.
Track Bus and Feeder Wires
Even if your track was reliable under DC, DCC's higher-frequency signal demands better electrical continuity. Best practices include:
- Running a main power bus (14–16 AWG) under the layout
- Soldering feeder wires to every 3–4 feet of track
- Avoiding reliance on rail joiners alone for electrical continuity
- Using a DCC-compatible track cleaner regularly to maintain good contact
Step 5: Program Your Decoders
Once your locomotives are equipped and your layout is wired, it's time to program your decoders. Most DCC systems offer two programming modes:
Programming Track Mode
This isolates a single locomotive on a short section of dedicated track, allowing you to safely read and write all CV (Configuration Variable) settings. Use this mode for initial setup and detailed tuning.
Main Line Programming (OPS Mode)
This allows you to program a specific locomotive by address while it sits anywhere on the layout — without affecting other trains. Use this for quick adjustments during an operating session.
Essential CVs to Configure
- CV1 – Short Address: Assign a unique address to each locomotive (typically the road number)
- CV29 – Configuration Register: Sets direction, speed steps, and addressing mode
- CV2 – Start Voltage: Sets the minimum voltage to get the motor moving
- CV3/CV4 – Acceleration/Deceleration: Adjust momentum for prototypical performance
- Sound CVs: If using a sound decoder, spend time adjusting individual volume levels for each sound effect
Upgrading Starter Sets to DCC
If you're working from a beginner HO scale starter set, be aware that most budget starter sets include a DC power pack and a locomotive without a DCC socket. Your first upgrade step will be purchasing a compatible entry-level DCC system and either replacing the locomotive with a DCC-ready model or having a decoder hardwired in.
For passenger-focused layouts, keep in mind that passenger car lighting can also be controlled via DCC with lighting decoders installed in your cars — a great way to add interior illumination that responds to layout conditions.
Frequently Asked Questions
Do I need to rewire my entire layout to switch to DCC?
Not necessarily. Simple layouts may need only minor wiring improvements, such as adding feeder wires and upgrading the main bus wire gauge. However, complex DC block wiring setups can actually be simplified when converting to DCC, since directional block control is no longer needed.
Can I run DC locomotives on a DCC layout?
Some DCC systems support a "DC compatibility mode" that allows older DC locomotives to run on DCC track, but performance is generally poor and it can cause motor overheating over time. It's best to equip all your locomotives with decoders for the full DCC experience.
How much does a typical DCC upgrade cost?
Costs vary widely. An entry-level DCC system runs $100–$200, while individual decoders range from $20 (basic silent) to $80+ (premium sound). A modest layout with 5–10 locomotives might require a total investment of $400–$800 for a complete upgrade.
What's the easiest DCC system for a beginner?
Systems like the NCE PowerCab and Digitrax Zephyr Xtra are consistently praised for their ease of use and strong beginner support. Both offer enough power for small-to-medium layouts and have excellent documentation and community forums.
Do sound decoders work in all scales?
Sound decoders are available for most popular scales, but N scale installations can be tight due to speaker size constraints. Micro speakers and sugar-cube speakers have improved N scale sound significantly in recent years, though HO scale still generally offers the best sound quality due to more available space.
Conclusion
Upgrading to DCC is one of the best investments you can make in your model railroad hobby. The process — assessing your layout, choosing a system, installing decoders, improving your wiring, and programming — may seem involved at first glance, but each step is manageable when tackled in order. Thousands of hobbyists make this transition every year and consistently say they wish they had done it sooner.
The best way to upgrade to DCC is simply to start: pick your command station, equip your favorite locomotive first, and let the experience build your confidence from there. Before long, you'll be running multiple trains with realistic sound and smooth independent control that makes every operating session feel like the real thing.
Ready to keep learning? Explore more expert guides right here on Model Train Insider — from scale selection to locomotive reviews to layout building tips. The hobby gets richer the deeper you go.
Affiliate Disclosure: Some links in this article are affiliate links. We may earn a commission at no extra cost to you.
Enjoying this guide?
Browse our favorite recommended products.
James Mitchell
Model Train Enthusiast & Writer
James has been building layouts and collecting trains for over 15 years. He started Model Train Insider to help newcomers navigate the hobby with practical, no-nonsense advice drawn from hands-on experience.
Stay on Track
Get beginner guides, brand reviews, and layout tips delivered to your inbox. No spam—just trains.
Free forever. Unsubscribe anytime.
Related Articles
Diesel vs Steam Locomotives: A Guide to Choosing Your Model Train
Struggling to decide between steam or diesel for your layout? Our guide compares steam and diesel model locomotives to help you make the right choice.
Read more
Best Starter Model Train Sets for Adults: A Comprehensive Guide to Your New Hobby
Discover the best starter model train sets for adults. Learn how to choose the right scale, brand, and layout to kickstart your rewarding model railroading hobby.
Read more
The Ultimate Beginner Guide to Model Railroading: Start Your Journey Today
Discover how to start your model train hobby with our ultimate beginner guide. Learn about scales, track layouts, and essential gear to build your dream railroad.
Read more