How to Troubleshoot Locomotive Power Issues: A Comprehensive Guide
If you've ever set up your layout, flipped the power switch, and watched your prized locomotive sit motionless on the track, you know the sinking feeling that follows. Whether you're a seasoned hobbyist or just getting started with your first setup, learning how to troubleshoot locomotive power issues is one of the most valuable skills you can develop. Power problems are among the most common complaints in the model railroad hobby — and thankfully, most of them have straightforward solutions once you know where to look.
The challenge is that locomotive power issues can stem from a surprisingly wide range of sources: dirty track, faulty wiring, decoder problems, worn motor brushes, or even a bad power supply. Without a systematic approach, diagnosing the problem can feel like searching for a needle in a haystack. This guide is designed to give you exactly that — a structured, step-by-step troubleshooting framework that helps you identify and resolve the most common power-related problems quickly and confidently.
Whether you're running a traditional DC layout or a modern DCC system, the principles covered here apply broadly across scales and locomotive types. By the end of this article, you'll have a solid understanding of how to diagnose power issues methodically, what tools to keep on hand, and when it might be time to call in a professional repair service or consider an upgrade. Let's get your trains moving again.
Start with the Basics: Rule Out the Obvious
Before diving deep into wiring diagrams or decoder configuration, always start with the simplest possible explanations. Experienced hobbyists will tell you that the most embarrassing — and most common — cause of a locomotive not running is something completely mundane.
Check Your Power Supply First
Is your power supply actually delivering power? Check that the unit is plugged in, turned on, and that its indicator lights (if any) are functioning normally. A tripped breaker or a blown fuse inside the power pack is easy to miss. If you're unsure whether your power supply is performing correctly, consider investing in a quality unit — our detailed breakdown in The Best Power Supplies for Model Trains: A Complete Buying Guide can help you evaluate whether your current setup is up to the task.
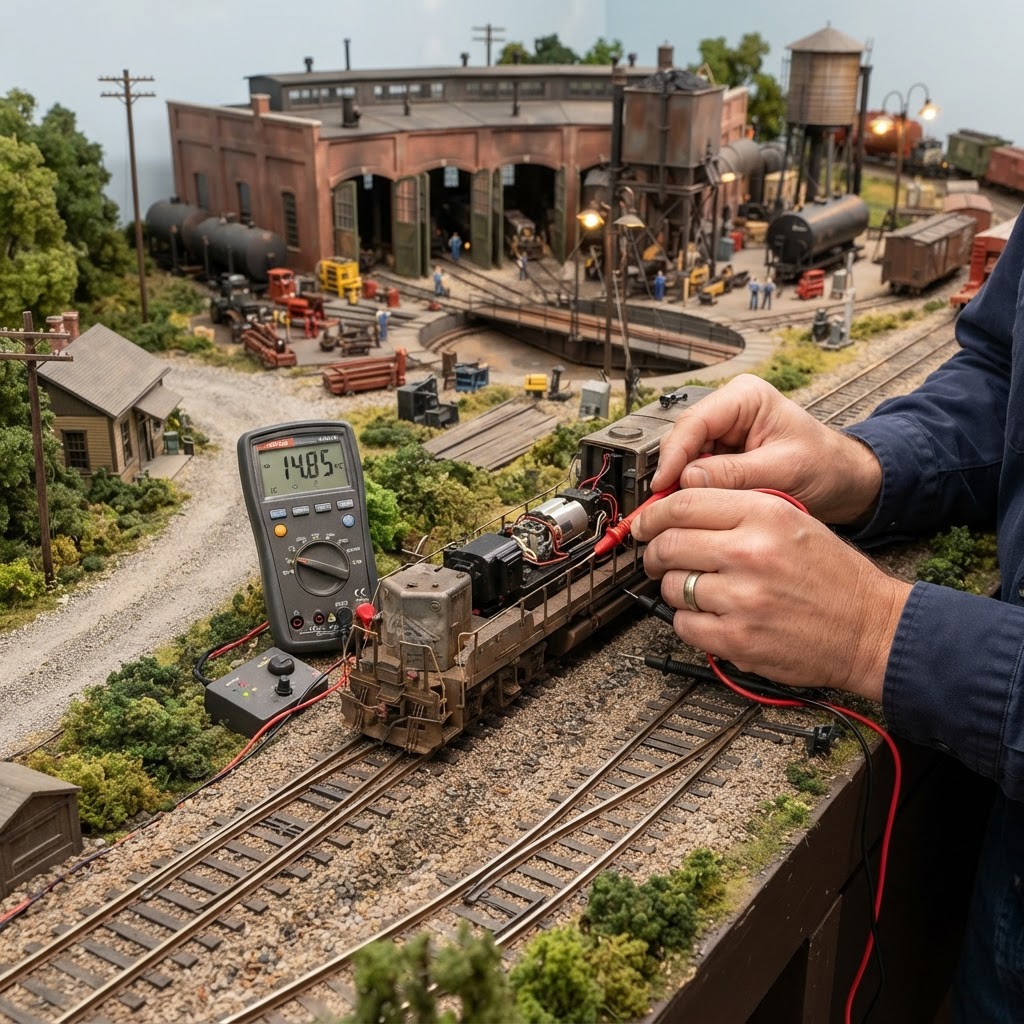
Use a multimeter set to DC voltage and probe your track terminals directly. You should see a reading consistent with your throttle setting — typically somewhere in the 0–12V range for HO scale DC layouts. No reading? The problem is upstream of the track. A reading in the expected range? Move on to the next step.
Inspect the Track
Dirty track is the single most common cause of intermittent or complete loss of power to a locomotive. Even a thin film of oxidation, dust, or oil can disrupt the electrical connection between the rail and the locomotive's wheels.
- Run a track cleaning car or a lint-free cloth dampened with isopropyl alcohol along the rails
- Inspect joiners (rail fishplates) for corrosion or poor contact — these are notorious trouble spots
- Check for any physical damage: bent rails, gaps that have widened, or sections that have lifted from the roadbed
- On longer layouts, verify that your track feeders are connected at regular intervals (every 3–6 feet is a good rule of thumb for most scales)
A reliable track cleaning routine will prevent the majority of intermittent power problems before they start.
Isolate the Locomotive
Once you've confirmed that your power supply and track are functioning correctly, it's time to focus on the locomotive itself. The most efficient method is to place the suspect locomotive on a known-good section of track — ideally a short test loop that you keep clean and well-maintained specifically for troubleshooting purposes.
Check the Wheels and Pickups
Dirty or oxidized wheel treads are almost as common as dirty track. Use a cotton swab or track cleaning eraser to clean the wheel faces and flanges. On locomotives with multiple axles, clean every set of wheels — power pickups are typically spread across several axles, and a single dirty set can cause problems.
Also inspect the pickup wipers or contact strips inside the locomotive. These small metal tabs press against the back of the wheel or axle and are responsible for transferring current from the wheels to the motor or decoder. If they're bent out of position, corroded, or broken, power won't reach the motor. Carefully reforming bent wipers with a dental pick or small screwdriver often solves the problem instantly.
Test the Motor Directly
If the wheels and pickups look good, the next step is to test the motor itself. On a DC locomotive without a decoder, you can carefully apply a small, regulated DC voltage (around 3–5V is usually safe for testing) directly to the motor terminals using alligator clip leads. If the motor spins freely, the motor is fine and the problem lies in the pickup path. If the motor doesn't respond at all or sounds labored, you may have a burned armature, worn brushes, or a seized mechanism.
For locomotives with DCC decoders, this process is a bit different — see the section below.
Troubleshooting DCC-Specific Power Issues
DCC (Digital Command Control) introduces an additional layer of complexity to power troubleshooting. A locomotive that runs fine on a DC test track but won't respond on your DCC layout may have a decoder-related issue rather than a mechanical one.
Confirm Your DCC System Is Outputting Track Power
Use a multimeter set to AC voltage (DCC track power is an AC square wave, typically reading 12–16V depending on scale) and verify that your command station is actually outputting power to the track. If you're new to DCC and still evaluating systems, our guide to the 10 Best DCC Systems for Beginners to Start Your Model Railroad Journey in 2024 can help you understand what to look for in a reliable command station.
Check the Decoder Address
One surprisingly common DCC issue: you're trying to operate the locomotive on the wrong address. If a locomotive was previously programmed by someone else or came pre-programmed from the factory with a specific address, it won't respond to address "3" (the default short address). Try using address "0" on a programming track to reset or read the current address.
Inspect the Decoder Wiring
Open the locomotive shell and examine the decoder installation closely. Look for:
- Loose harness connections: The 8-pin or 21-pin connector can work itself loose over time, especially if the locomotive has been handled frequently
- Shorted wires: A motor wire touching a frame wire will trigger the decoder's short-circuit protection and shut the locomotive down
- Burned or damaged decoder: A telltale smell of burnt electronics or visible discoloration on the circuit board is a sure sign the decoder has failed
If you suspect a failed decoder, it's worth replacing it with a quality unit. For locomotives where sound is important to you, check out our roundup of the Best DCC Sound Decoders: Top Picks for Realistic Locomotive Audio for some excellent options.
Reset the Decoder
Most decoders can be reset to factory defaults by writing a value of 8 to CV8 on the programming track. This clears any CV settings that may be causing unusual behavior — including momentum settings so high that the locomotive appears to be unresponsive, or a speed table that's been configured incorrectly.
Mechanical Issues That Mimic Power Problems
Not every "power issue" is actually electrical. Sometimes the locomotive receives power just fine, but a mechanical problem prevents it from moving — and the symptoms can look identical to a power failure.
Check the Drivetrain
Place the locomotive on the track, apply power, and gently touch the top of the shell. Can you feel the motor vibrating? If yes, power is reaching the motor, and the problem is mechanical. Common culprits include:
- A derailed or jammed flywheel
- Broken or dislodged drive shaft couplings
- A seized gearbox (often caused by excessive lubrication that has thickened over time, or by a foreign object in the mechanism)
- A cracked or stripped gear
Disassemble the mechanism and rotate the drivetrain by hand. It should turn smoothly with only light resistance. Any binding, grinding, or hard stops indicate a mechanical problem that needs to be addressed separately from the electrical system.
Lubrication: Too Much Is Just as Bad as Too Little
Over-lubrication is a genuine problem that many hobbyists don't think about. Thick oil or grease that has migrated onto the wheels or motor brushes can insulate the electrical contact points and cause intermittent power issues. Use only manufacturer-recommended lubricants in very small quantities, and never apply oil to commutators, brushes, or wheel treads.
Tools Every Hobbyist Should Have for Power Troubleshooting
Having the right tools on hand makes troubleshooting dramatically faster. Here's what we recommend keeping in your workbench:
- Digital multimeter — essential for measuring voltage, resistance, and continuity
- Track cleaning car and cleaning fluid — for routine maintenance
- Alligator clip test leads — for bypassing sections of the circuit during testing
- Dental picks and small screwdrivers — for adjusting pickups and inspecting mechanisms
- Programming track (for DCC layouts) — isolates a single locomotive for safe CV programming
- Small magnifying glass or loupe — for inspecting tiny decoder connections and wheel treads
For a curated list of tools and products we trust, visit our recommended products page.
Frequently Asked Questions
Why does my locomotive run on DC but not on DCC?
This usually points to a decoder issue rather than a mechanical problem. The locomotive's motor and pickups are working fine (proven by DC operation), but the decoder may be damaged, improperly wired, or programmed to an unexpected address. Try reading the decoder on a programming track and resetting it to factory defaults.
Why does my locomotive run in one direction but not the other?
This is a classic symptom of a partially failed motor brush or a wiring issue specific to one polarity. On a DC locomotive, inspect the brushes for wear. On a DCC locomotive, check the decoder's motor output wires — one of the motor wires may have a poor connection.
How often should I clean my track?
For an actively used layout, a light cleaning every two to four weeks is a reasonable baseline. Layouts in dusty environments or those with a lot of steam-era weathering effects may need more frequent attention. Consistency matters more than frequency — regular light cleaning prevents the kind of heavy oxidation that requires aggressive treatment.
My locomotive worked fine yesterday. What changed?
Temperature and humidity fluctuations are a surprisingly common culprit — metal expands and contracts, which can open up previously marginal connections. Also check whether any maintenance was performed recently (lubrication, decoder programming, track work) that may have inadvertently introduced a new problem.
When should I send a locomotive in for professional repair?
If you've worked through all the steps above and the locomotive still doesn't operate, or if you've found obvious physical damage (burned decoder, cracked frame, seized gearbox with broken gears), it's often worth sending higher-quality locomotives to a professional repair service. For premium models like those covered in our Athearn Genesis vs Standard Line: Is the Premium Upgrade Worth It? comparison, a professional repair is almost always more cost-effective than replacement.
Conclusion
Troubleshooting locomotive power issues doesn't have to be an intimidating experience. By working through the problem methodically — starting with your power supply and track, moving to the locomotive's wheels and pickups, and then addressing DCC or mechanical issues — you can resolve the vast majority of problems at your own workbench in an evening. The key is patience, a logical sequence, and the right tools for the job.
If you're still building out your layout and want to make sure you're starting on solid footing, we have a wealth of guides to help. New to the hobby? Check out our 7 Best Starter Train Sets for New Hobbyists to Begin Their Journey or explore our HO Scale vs N Scale: The Ultimate Comparison for Beginners to make sure you're in the right scale for your goals and space. Already running HO? Our Best HO Scale Starter Set for Adults guide highlights some excellent entry points with reliable, easy-to-maintain equipment.
Keep exploring, keep learning, and most importantly — keep your trains running. There are plenty more guides right here at Model Train Insider to help you at every stage of the hobby.
Affiliate Disclosure: Some links in this article are affiliate links. We may earn a commission at no extra cost to you.
Enjoying this guide?
Browse our favorite recommended products.
James Mitchell
Model Train Enthusiast & Writer
James has been building layouts and collecting trains for over 15 years. He started Model Train Insider to help newcomers navigate the hobby with practical, no-nonsense advice drawn from hands-on experience.
Stay on Track
Get beginner guides, brand reviews, and layout tips delivered to your inbox. No spam—just trains.
Free forever. Unsubscribe anytime.
Related Articles
The Best DCC Decoders for Locomotive Upgrades: A Comprehensive Guide
Transform your model railroad fleet with our expert guide to the best DCC decoders for locomotive upgrades. Boost performance and sound quality today.
Read more
DCC Controller Review: Top 5 Picks for Precision Control and Best Value
Looking for the right DCC controller? Our comprehensive review breaks down the best value units for model train hobbyists seeking precision and easy operation.
Read more
How to Clean Track Rails Effectively: The Ultimate Guide for Smooth Running Trains
Learn how to clean track rails effectively to ensure your model trains run smoothly. Discover the best tools and techniques for pristine, conductive tracks.
Read more